The Absolute Beginner’s Guide: Part Two, Coals
We are working our way down the hookah. Last time we discussed all the major parts of a hookah and what they do to help maximize your smoking experience. This time, we’re going to get into the gritty details of the hookah experience with a look at coals. What are they, what do they do and how do we use them best. So, lets not waste any more time.
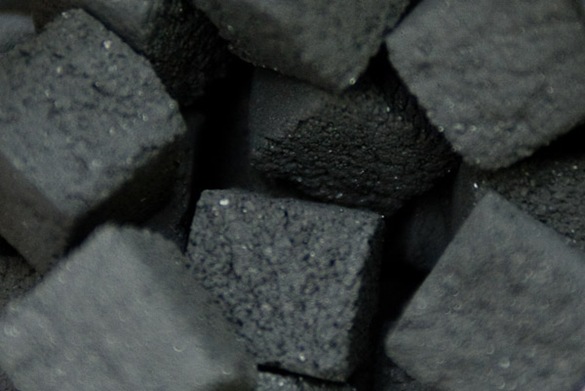
Coals are an absolute essential part of the hookah experience. They are among the few things truly setting hookah apart from virtually every other kind of pipe out there. In short, the coals are the source of heat which causes the tobacco to produce smoke.
In the Hookah Anatomy, coals that have already been lit are placed on top of the tin foil sealing the bowl. Depending on what kind of bowl you’re using and what style and brand of coals you’ve chosen, you may need anywhere from 1 to 5 coals at once. Lets take a quick look at the different styles of coals and how to use them.
When it comes to coals, there are two major options. Quick Lights and Naturals.
Quick Light Coals
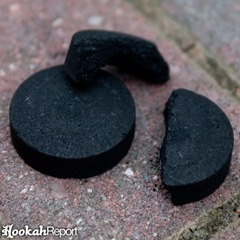 Quick Light coals are exactly what the name suggests. They are designed to light with very little time and effort and without needing any other bulky or expensive equipment. The drawback, however is that they generally produce less heat, burn faster, and in some cases, may have a subtle taste associated with them.
Depending on which Quick Light coals you choose, having adequate control over your heat may require you to break your coals in half, such as the one pictured to the left.
Lighting Quick Light Coals
Quick Light coals can be lit with virtually any high-heat source. A coil/gas stove top, a lighter, a grill, a torch. It’s really up to you and there’s no wrong way to do it per se. Depending which brand you’ve chosen, the exact lighting method will vary and in time you’ll discover the best way to do it. But in general, applying high-heat or open flame for 10 – 30 seconds will do the trick.
When enough heat has been applied, the outside of the coal will begin to spark and produce smoke. The smell will probably be reminiscent of the old 4th of July sparklers. The sparks will eventually engulf the coal and then almost immediately stop. At this point, the coal is lit, but won’t be ready to use. With quick light coals it is extremely important to wait until the outside of the coal has fully ashed over—you can tell this has happened when the coal has turned a light grey color. Beginning to use them before they have fully ashed over may give you a headache from the carbon monoxide produced during the lighting process. Or worse, could make you sick. So be patient!
Natural Coals
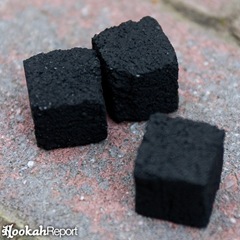 Most experienced smokers choose natural coals because there is virtually no taste and they generally offer more control over heat management because they burn hotter and longer and are usually smaller in size and shape. They also tend to produce less ash then the quick light alternatives. Though this is not universally the case. Most popular brands of natural coals are made from compressed coconut shells.
Lighting Natural Coals
To light natural coals, they need to be exposed to high-heat for an extended period of time. This generally means a coil or gas stove. I suppose if you had five or six cigarette lighters and a lot of patience, you could light natural coals that way, but I wouldn’t recommend it.
Most choose the coil stove option because inexpensive portable coil burners are readily available. To light your natural coals on a coil stove, place your coals directly on the coil. Turn the burner on as high as it will go. Leave the coals alone for 8 – 12 minutes. Once the coals have ashed over (turned light grey on the outside), they are ready to use. You may speed up the lighting process a tad by flipping the coals over after about 5 minutes. When the coals are fully lit, place them in your coal carrier (or small frying pan) and carry them to your hookah.
If you have a gas stove, you will need to place the coals in the flame. The process will take about as long as a coil stove. The process is pretty much the same as a coil stove but beware, with gas burners, the ash produced during lighting can clog your gas lines. So make sure you know where the ash is falling to keep from damaging your equipment.
Which Kind of Coal Are You?
Deciding whether you want to use natural coals or quick light coals is purely a matter of preference. Both styles have their advantages and their disadvantages, which I have described above. Here’s a quick set of guidelines to help you decide which might work best for your lifestyle.
On-The-Go – Many people like to take their hookah with them when they go to friend’s houses, or to parties. Because a stove option isn’t always available in these situations, quick light coals are an excellent choice.
Brand New – Not everyone who buys a hookah will stick with it. If you’re brand new to the hookah tradition and you’re not sure you’re going to be sticking with it in the long-run, quick light coals provide a good way to get started without having to invest in extra equipment.
Taste Sensitivity – Many people who start with quick light coals, then later try naturals, find they can taste the difference. If you’re someone who is generally sensitive to subtle changes in taste, you may find natural coals are a better choice for enjoying your bowl to its fullest potential.
Control Freak – Most brands of natural coals give you more control over your heat management, without having to modify (cut or break) the coals. If you want total control over your heat management, natural coals may be a good fit for your lifestyle.
Specialty Bowls – Specialty bowls such as Phunnel and Vortex bowls require specialized heat management. This can be tricky with most standard quick light coals. If you plan to use a specialty bowl, natural coals will probably be a better choice for you, though comparable quick light options are available, such as Chronic Hookah Quick Lights, which mimic the size and shape of most natural coals.
Using Your Coals Once They’re Lit
How you use your coals once they’re lit depends entirely on how you packed your bowl, what hole pattern you used to puncture the tin-foil, and of course what kind of bowl you’re using. It’s impossible to give a catch-all answer to how to use the coals once they’re lit. Trial and error is a good method, but even better is joining a community and asking about your specific set-up.
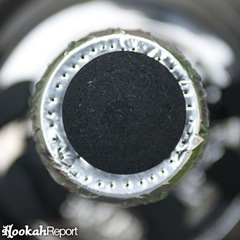
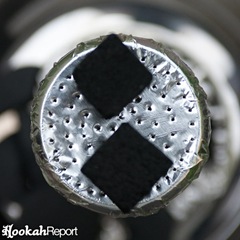
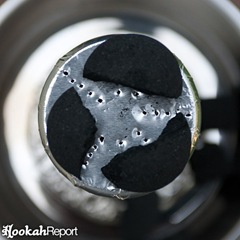
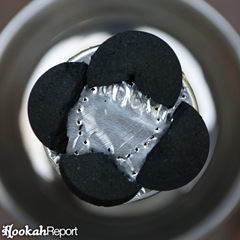
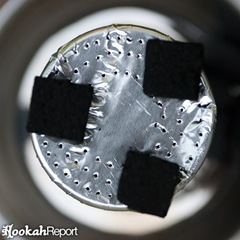
To get you started, however, here are some basic guidelines for both natural and quick light options for the popular bowl styles. For demonstration purposes, these coals have not been lit. These recommendations assume that you have packed your bowl with a standard, loose pack method.
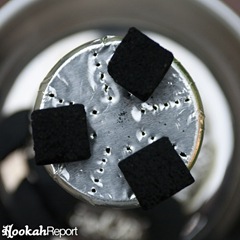 |
Natural Coals on a Vortex Bowl Typically three natural coals are sufficient to heat tobacco inside a Vortex bowl. They can be set along the outside and may be rotated as the bowl burns. |
In the Next Post
Next time we’ll be talking about the all-important process of packing your bowl. There are many different styles and methods. Selecting the one that is right for you can seem challenging, but it doesn’t have to be. Check back next time to learn how to pack your bowl to get an excellent session with as little fuss as possible.





Leave your response!